
Key Features
- Interactive Chat Interface - Test conversational AI with real-time responses
- Parameter Tuning - Adjust temperature, max tokens, and other model parameters
- Agent Mode - Test tool execution with Heroku and MCP tools
- Code Export - Copy validated configurations as code snippets
- Multi-Model Support - Switch between different AI models instantly
- Dark/Light Mode - Customize the interface to your preference
Use Cases
Prompt Engineering
Fine-tune prompts for your specific use case without deploying code:- Customer Support Chatbots - Test different system prompts to ensure appropriate tone and helpfulness
- Content Generation - Experiment with creative vs. factual writing styles
- Data Extraction - Validate prompt structures for parsing structured data from text
- Translation Tasks - Compare output quality across different prompt formulations
- Start with a basic prompt in AI Studio
- Adjust system instructions to guide behavior
- Test with various user inputs
- Refine based on output quality
- Export finalized prompt to your code
Model Exploration
Understand the capabilities and limitations of different models:- Compare Response Quality - Test the same prompt across Claude 4 Sonnet, Haiku, and other models
- Assess Speed vs. Quality - Evaluate which model balances performance with your requirements
- Test Extended Thinking - Experiment with extended thinking for complex reasoning tasks
- Evaluate Cost Trade-offs - Understand token usage across different models
Tool Testing
Verify that tools work correctly before production deployment:- Database Queries - Test pg_psql queries against your follower database
- Code Execution - Validate Ruby, Python, Go, or Node code execution tools
- Custom MCP Tools - Ensure your deployed MCP servers respond correctly
- Multi-Tool Workflows - Test agents that use multiple tools in sequence
- Enable Agent Mode in AI Studio
- Add pg_psql tool
- Ask “Show me all users created in the last 7 days”
- Verify the agent constructs the correct SQL query
- Check the returned results match expectations
Integration Preparation
Prepare for production integration with validated configurations:- System Prompt Validation - Ensure instructions are clear and effective
- Parameter Optimization - Find the right temperature and token limits
- Error Handling - Test edge cases and error scenarios
- Code Generation - Export working configurations as code snippets
Get Started with AI Studio
To access AI Studio:- Open the Heroku Dashboard.
- Select the app that has the Managed Inference and Agents add-on attached.
-
Select the
Resourcestab. -
Select
Heroku Managed Inference and AgentsunderAdd-on Services. If you don’t have the add-on yet, use the search bar to find and add the Heroku Managed Inference and Agents add-on. -
Select
Open Playground.
Using AI Studio
Chat Interface
The main chat interface allows you to:- Send Messages - Type questions or instructions to test model responses
- View Responses - See real-time answers with streaming support
- Review History - Scroll through the conversation to track context
- Start New Conversations - Clear history to begin fresh tests
Configure Parameters
Adjust AI behavior by modifying parameters in the right panel: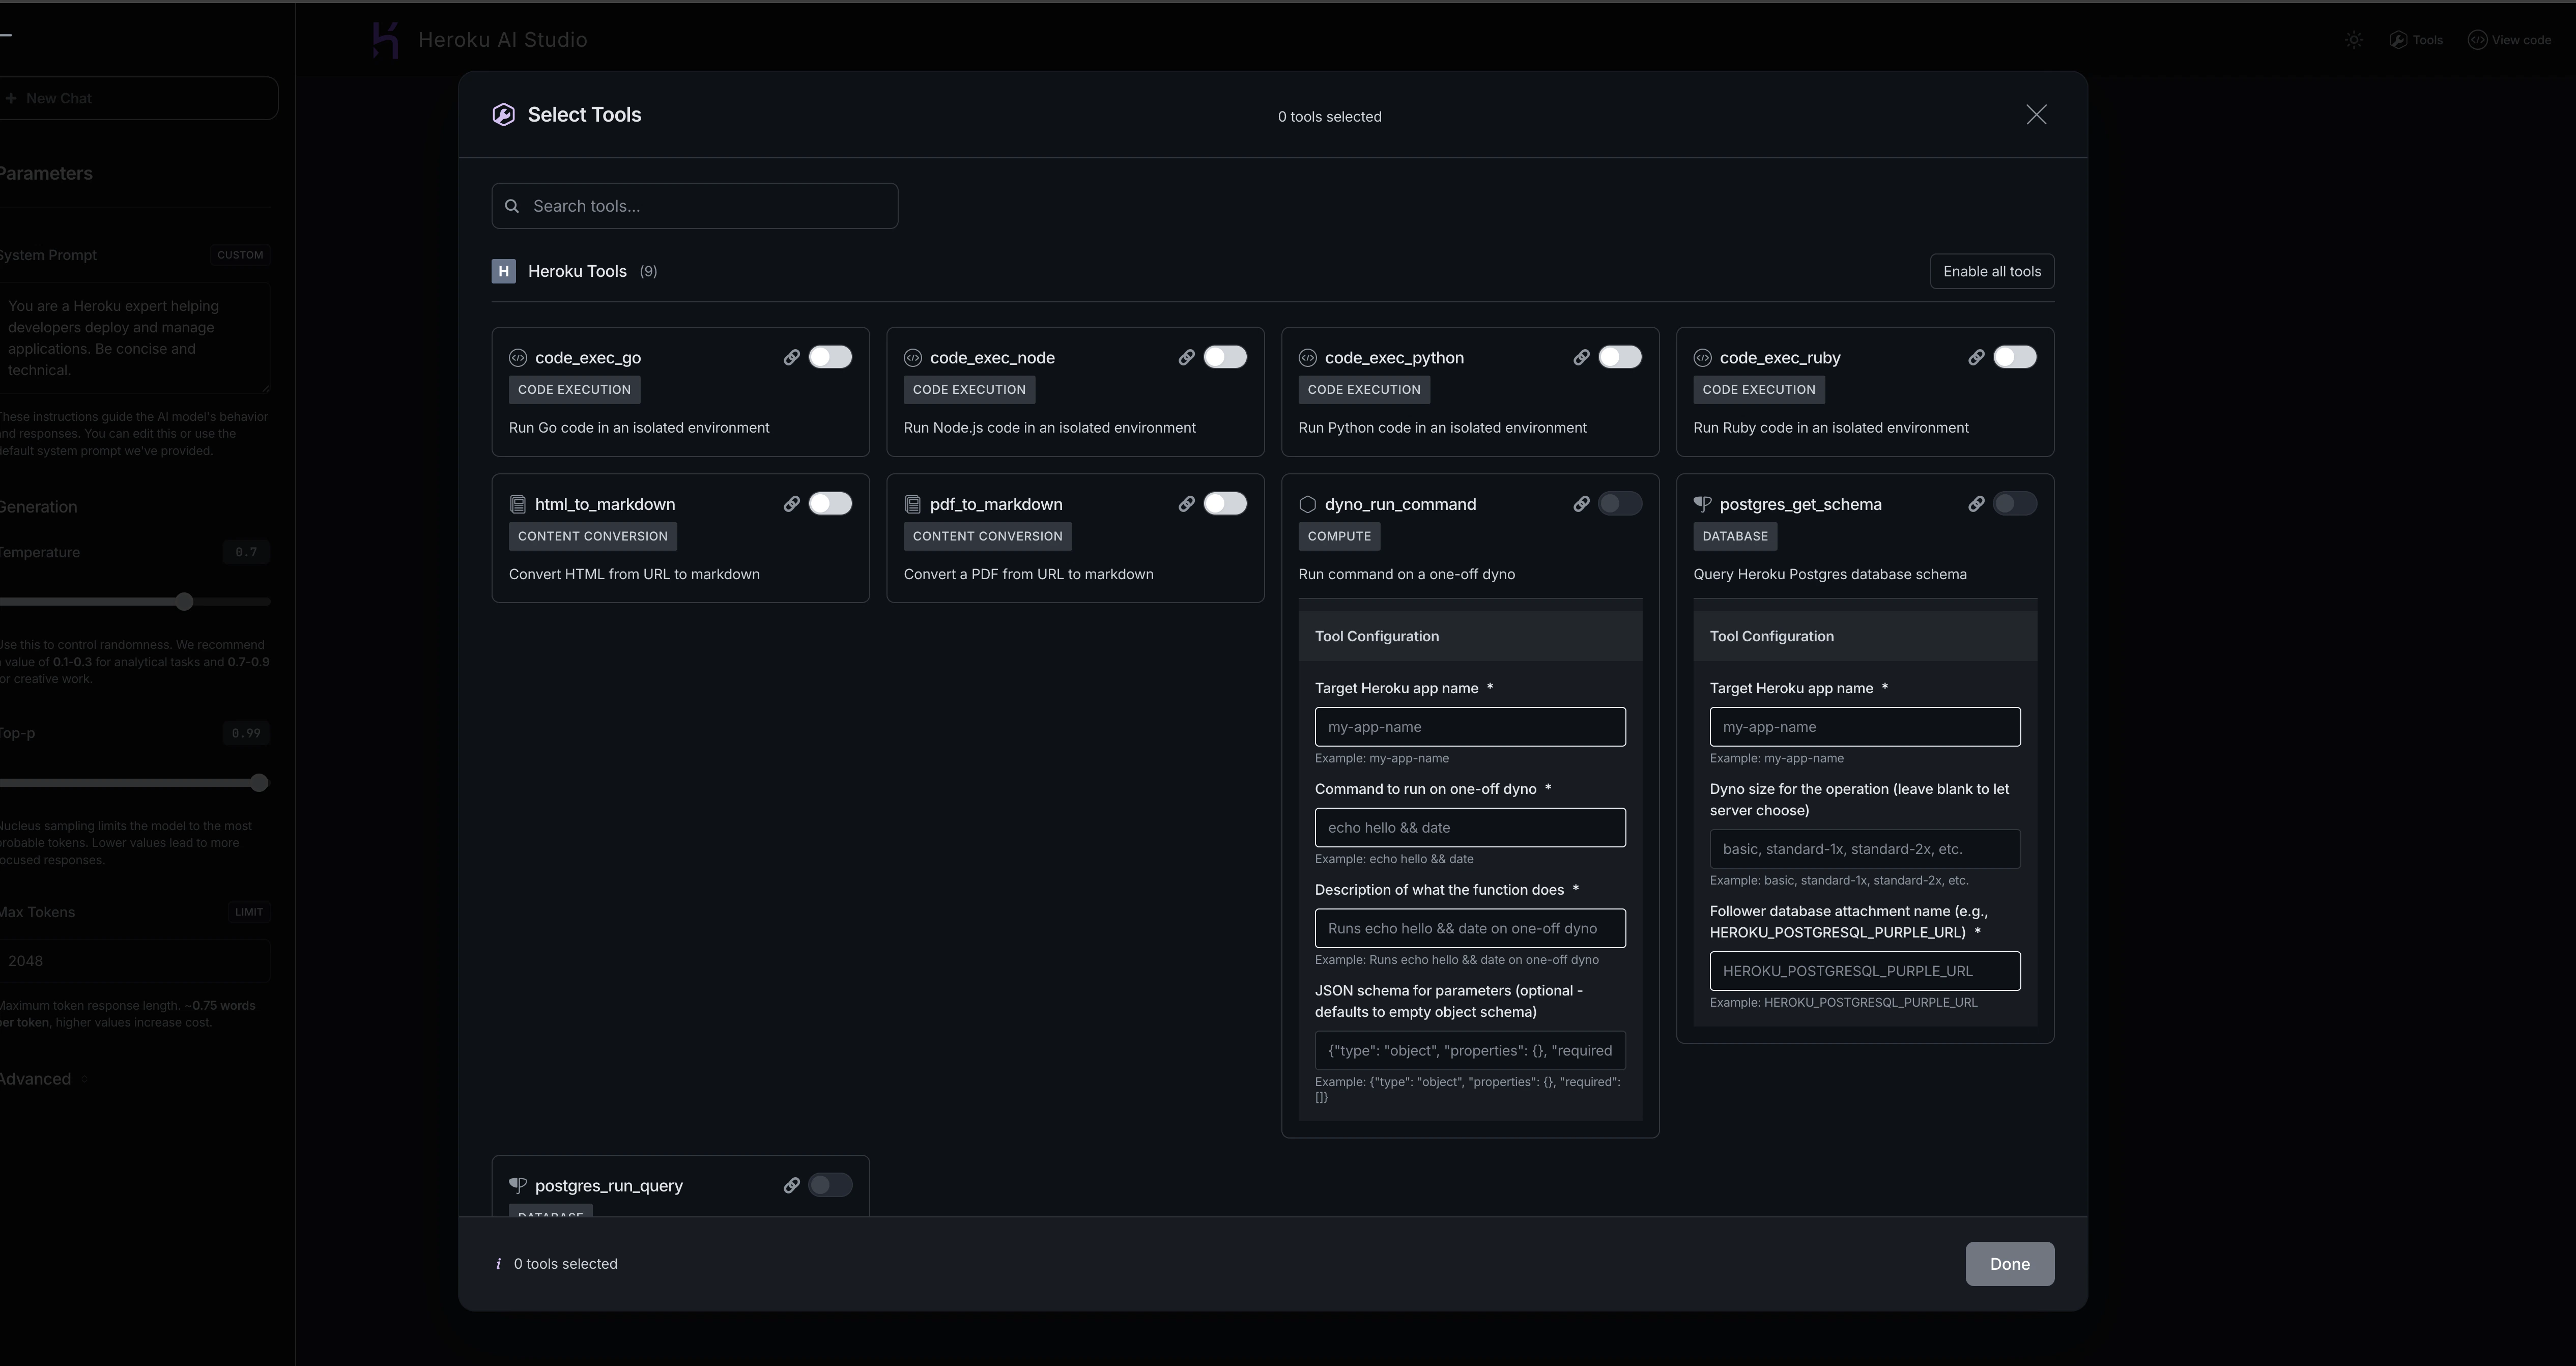
System Prompt
Instructions that guide the model’s behavior, tone, and expertise. Examples:- “You are a helpful customer support agent. Be friendly and concise.”
- “You are a data analyst. Provide technical, data-driven responses.”
- “You are a creative writer. Use vivid descriptions and storytelling.”
Temperature (0.0 - 1.0)
Controls response randomness and creativity.- 0.0 - 0.3: Focused and deterministic (good for factual responses)
- 0.4 - 0.7: Balanced creativity and consistency
- 0.8 - 1.0: More creative and diverse outputs
Top-p (0.0 - 1.0)
Nucleus sampling that limits token selection to most probable options.- Lower values (0.5-0.7): More focused responses
- Higher values (0.9-0.999): More diverse vocabulary
Max Tokens
Maximum response length in tokens (approximately 4 characters per token).- 512: Short, concise responses
- 1024: Standard responses
- 4096+: Long-form content
Stop Sequences
Text patterns that immediately stop generation when encountered. Example: Add--- as a stop sequence to prevent the model from generating beyond that marker.
Agent Mode
Enable Agent Mode to allow the model to use tools:- Toggle Agent Mode on in the interface
- Click Tools in the upper-right corner
- Select which tools to enable:
- Heroku built-in tools (code execution, database queries)
- Your custom MCP tools
- Configure tool-specific parameters like
target_app_name - Start chatting - the agent will automatically call tools when needed
Export Code
Once you’ve validated a configuration:- Click View Code in the interface
- Choose your preferred language (Python, JavaScript, cURL, etc.)
- Copy the generated code snippet
- Paste into your application
- Your validated system prompt
- All parameter settings
- Tool configurations
- Authentication setup
Interface Controls
- Moon/Sun Icon - Switch between dark and light modes
- Tools Button - Configure agent tools
- Parameters Panel - Adjust model settings
- New Chat - Start a fresh conversation
- Model Selector - Switch between available models
Best Practices
Start Simple, Then Iterate
- Begin with basic prompts and parameters
- Test with a few examples
- Gradually add complexity as you understand model behavior
Use Agent Mode Strategically
- Test tools individually before combining them
- Verify tool responses match expectations
- Set appropriate
max_callsto prevent infinite loops
Document Your Findings
- Note which prompts work best for your use case
- Record optimal parameter settings
- Save successful configurations via code export
Test Edge Cases
- Try unusual inputs to understand model limitations
- Test error handling scenarios
- Verify behavior with empty or malformed inputs
Troubleshooting
Tool Not Responding
- Verify your target app has the necessary resources (database, dynos)
- Check that follower databases are properly configured
- Ensure MCP servers are deployed and registered
Unexpected Responses
- Review system prompt for clarity and specificity
- Adjust temperature if responses are too random or too rigid
- Consider adding stop sequences to prevent over-generation
Slow Performance
- Try a faster model like Claude 3.5 Haiku
- Reduce max_tokens for quicker responses
- Check if tool execution is causing delays
Related Resources
Chat Completions API
Integrate validated prompts into your code
Agents API
Deploy agent workflows to production
Heroku Tools
Learn about available tools
Model Cards
Compare model capabilities